Monday 27 August 2012

ROCKIN PUNK BABE


THIS TUTORIAL WAS WRITTEN BY ME ON 27TH AUGUST 2012
IT ASSUMES YOU HAVE WORKING KNOWLEDGE OF PSP AND ANIMATION SHOP
ANY RESEMBLENCE TO ANY OTHER TUTORIAL IS PURELY COINCIDENTAL
THIS WAS MADE USING VERSION 9 OF PSP BUT CAN BE DONE IN OTHERS
YOU WILL NEED:
TEMPLATE 8 BY KRISTIN FROM TOXIC DESIREZ
TUBES OF CHOICE, I AM USSING THE WORK OF KEITH GARVEY AND YOU WILL NEED A LICENCE TO USE HIS WORK FROM HERE
SCRAP KIT 'FEEL THE ROCK' BY ALIKA FROM HERE
EYE CANDY 4000 - GRADIENT GLOW
CENTRALSPARK ANIMATION BY MISSY HERE

ON TO THE TUTORIAL
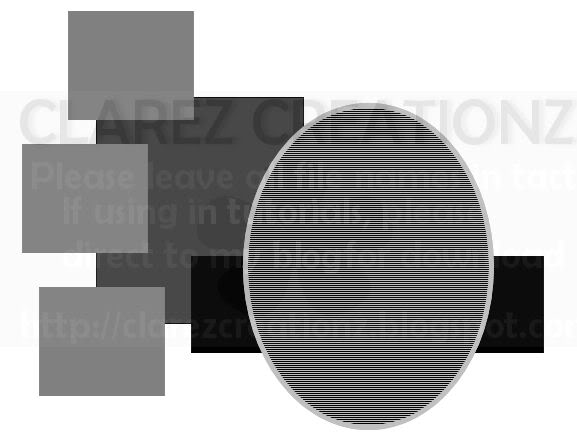
OPEN THE TEMPLATE AND DUPLICATE - CLOSE THE ORIGINAL - DELETE THE COPYRIGHT
HIGHLIGHT CIRCLE1 - SELECTIONS - FLOAT - OPEN PAPER OF CHOCIE AND PASTE AS A NEW LAYER - DELETE ORIGINAL LAYER
HIGHLIGHT RECTANGLE2 LAYER - SELECTIONS - FLOAT
OPEN TUBES OF CHOICE AND PASTE AS NEW LAYERS - POSITION WHERE U LIKE
MERGE THE TUBES TOGETHER - CHANGE BLEND MODE TO LUMINANCE LEGACY AND LOWER THE OPACITY TO AROUND 75
EFFECTS - TEXTURE - BLINDS
2 - 50 - BLACK - BOTH BOXES CHECKED
HIGHLIGHT WORDS LAYER AND CHANGE TO GREY
ADD A SMALL WHITE GRADIENT GLOW TO IT
REPEAT WITH BOTH THE SKULLS
HIGHLIGHT THE LARGE CIRCLE WE USED EARLIER AND APPLY THE SAME GRADIENT GLOW BUT WITH BLACK
AND REPEAT WITH RED AND AGAIN WITH BLACK
HIGHLIGHT RECTANGLE1 LAYER - FLOAT - ADD A PAPER OF CHOICE - INVERT AND HIT DELETE - DELETE THE ORIGINAL LAYER
APPLY THE SAME GRADIENT EFFECT AS BEFORE
MERGE VISIBLE ALL LAYERS OF THE RECTANGLE
HIGHLIGHT CIRCLE2 LAYER ADD A GRADIENT GLOW AS BEFORE WITH WHITE
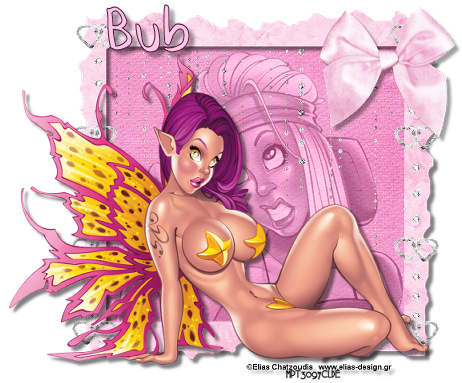
OPEN TUBE OF CHOICE AND PASTE AS A NEW LAYER - DROP SHADOW
DRAG THE RECTANGLE DOWN ( SEE MINE )
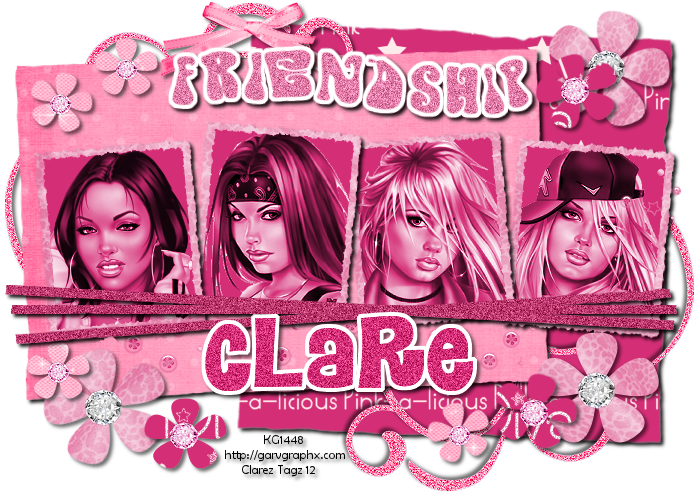
ADD THE COPYRIGHTS AND ANY TEXT YOU LIKE
AND ANY OTHER ELEMENTS
MERGE VISIBLE ALL THE LAYERS ABOVE THE CIRCLE
OPEN THE ANIMATION IN ANIMATION SHOP
DUPLICATE AND CLOSE THE ORIGINAL
RESIZE BY 70%
GO BACK TO PSP AND HIDE THE LAYER WITH THE TUBE AND RECTANGLE
RIGHT CLICK THE TOP AND COPY MERGED OF THE CIRCLE AND PASTE INTO ANIMATION SHOP AS A NEW ANIMATION
DUPLICATE UNTIL YOU HAVE 11 FRAMES
THEN PASTE THE ANIMATION ONTO THE CIRCLE
GO BACK TO PSP AND UNHIDE THE TUBE AND COPY THIS INTO ANIMATION SHOP AND REPEAT AS ABOVE
RESIZE IF REQUIRED
VIEW ANIMATION AS SAVE AS A .GIF
IF YOU HAVE ANY QUESTIONS REGARDING THIS TUTORIAL PLS LEAVE A MESSAGE IN THE CHAT
BOX OR EMAIL ME AT clare_33@live.co.uk
THANKS AND ENJOY!

Friday 24 August 2012

FRIENDS


CLICK IMAGE FOR FULL SIZE
THIS TUTORIAL WAS WRITTEN BY ME ON AUGUST 24TH 2012
IT ASSUMES YOU HAVE WORKING KNOWLEDGE OF PSP AND ANIMATION SHOP
ANY RESEMBLENCE TO ANY OTHER TUTORIAL IS PURELY COINCIDENTAL
THIS WAS MADE USING VERSION 9 OF PSP BUT CAN BE DONE IN OTHERS
YOU WILL NEED:
TEMPLATE 15 BY BECKY (at time of editing, blog no longer available - so I have attached it )
HERE
TUBES OF CHOICE, I AM USING THE WORK OF KEITH GARVEY AND YOU WILL NEED A LICENCE TO USE HIS WORK FROM GARV GIRLS
SCRAP KIT 'PINK-A-LICIOUS BY TAMIE AT ADDICTIVE PLEASURES

ON TO THE TUTORIAL:
OPEN THE TEMPLATE - DUPLICATE - CLOSE THE ORIGINAL
HIGHLIGHT LG DARKGREY LAYER - FLOAT - DELETE LAYER - OPEN PAPER OF CHOICE AND PASTE AS A NEW LAYER - INVERT - DELETE
HIGHLIGHT LIGHTGRAY PAPER  AND REPEAT ABOVE STEPS USING A DIFFERENT PAPER
HIGHLIGHT FRAME1BOTTOM - FLOAT - DELETE
OPEN PAPER OF CHOICE AND PASTE AS A NEW LAYER - INVERT DELETE
REPEAT WITH THE OTHER 3 FRAMES, USING THE SAME PAPER
HIGHLIGHT FRAME1TOP - FLOAT - DELETE
ADD A NEW LAYER AND FLOOD FILL WITH A MATCHING COLOUR
REPEAT WITH ALL THE OTHER BACKGROUNDS
HIGHLIGHT FRIENDSHIP LAYER - FLOAT - DELETE - ADD A NEW LAYER AND FLOOD FILL WITH A MATCHING COLOUR
ADJUST - ADD NOISE - GAUSSIAN - MONOCHROME - 35%
SELECTIONS - MODIFY - EXPAND -4 - ADD NEW LAYER - FLOOD FILL WHITE
DRAG BELOW THE NOISE LAYER
ADD DROP SHADOW OF CHOICE
MERGE VISIBLE THE STRIPS - SELECTIONS - FLOAT - DELETE - ADD NEW LAYER AND FLOOD FILL WITH COLOUR OF CHOICE
ADD THE SAME NOISE
ADD A DROP SHADOW TO ALL THE FRAMES
HIGHLIGHT THE FIRST FRAME - SELECT - FLOAT - DEFLOAT
OPEN A TUBE OF CHOICE AND PASTE AS A NEW LAYER - INVERT AND DELETE
MAKE SURE IT'S UNDER THE FRAME
CHANGE BLEND MODE TO LUMINANCE
REPEAT THE ABOVE WITH ALL THE FRAMES
DROP SHADOW THE STRIPS AND BACK PAPERS
MERGE VISIBLE ALL THE SMALL BLACK FLOWERS - SELECT - FLOAT - DELETE - OPEN PAPER OF CHOICE AND PASTE AS A NEW LAYER - INVERT A DELETE - DROP SHADOW
REPEAT WITH THE NEXT SIZED UP FLOWERS
AND AGAIN WITH THE LARGE ONES
OPEN DIAMOND AND RESIZE 75% - TWICE - ADJUST - SHARPEN - ADD A NEW LAYER AND PASTE AS A NEW SELECTION ON ALL THE LARGE FLOWERS
ACTIVATE THE DIAMOND AGAIN - COLOURIZE - H230 S -167
RESIZE 75% TWICE - SHARPEN AND ADD A NEW LAYER AND PASTE AS NEW SELECTION ON NEXT SIZE DOWN FLOWERS
REPEAT ON THE SMALL ONES
OPEN THE FLOWER TRAIL AND PASTE AS A NEW LAYER BELOW THE STRIPS
ERASE ANY PARTS OF IT THAT ARE NOW ON THE PAPER ( SEE MINE )
OPEN BOW3 AND RESIZE 55% - PASTE AS A NEW LAYER AND POSITION TOP LEFT OF BACK PAPER
ADD DROP SHADOW OF CHOICE
OPEN DOODLE AND PASTE AS A NEW LAYER - DROP SHADOW - DRAG TO THE BOTTOM
DUPLICATE - FLIP - MIRROR
ADD THE COPYRIGHTS AND ANY TEXT U LIKE
MERGE VISIBLE
RESIZE IF REQUIRED
SAVE AS A JPEG OR PNG
IF YOU HAVE ANY QUESTIONS REGARDING THIS TUTORIAL PLS LEAVE A MESSAGE IN THE CHAT
BOX OR EMAIL ME AT clare_33@live.co.uk
THANKS AND ENJOY!

Thursday 23 August 2012

GETTING THERE...

AM WORKING ON ADDING NEW SUPPLIES FOR YOU ALL :)
HOPE YOU LIKE THEM X

RED


DOWNLOAD HERE

TEMPLATE 81


DOWNLOAD '4SHARED' HERE


Wednesday 22 August 2012

FREAK GURL

 
THIS TUTORIAL WAS WRITTEN BY ME ON AUGUST 22ND 2012
IT ASSUMES YOU HAVE WORKING KNOWLEDGE OF PSP AND ANIMATION SHOP
ANY RESEMBLENCE TO ANY OTHER TUTORIAL IS PURELY COINCIDENTAL
THIS WAS MADE USING VERSION 9 OF PSP BUT CAN BE DONE IN OTHERS
YOU WILL NEED:
SCRAP KIT ' LITTLE FREAKS' BY KITTZ KREATIONZ
MASK OF CHOICE

ON TO THE TUTORIAL
 
OPEN A NEW TRANSPARENT IMAGE 700 X 700 AND FLOOD FILL WHITE
ADD A NEW LAYER AND SELECT ALL - OPEN A PAPER OF CHOICE AND PASTE INTO SELECTION - APPLY MASK OF CHOICE
OPEN LF-45 AND PASTE AS A NEW LAYER - RESIZE 65%
USE YOUR SELECTION TOOL AND DRAW A SQUARE AROUND THE INSIDE OF THE FRAME - OPEN A PAPER OF CHOICE AND PASTE AS A NEW LAYER - INVERT AND HIT DELETE AND DRAG BELOW THE FRAME
ADD DROP SHADOW OF CHOICE TO FRAME
 
OPEN LF-50 AND PASTE AS A NEW LAYER AND RESIZE 80% POSITION ( SEE MINE )
ADD A DROP SHADOW OF CHOICE
OPEN LF-8 AND PASTE AS A NEW LAYER - RESIZE 75% AND POSITION
ADD A DROP SHADOW OF CHOICE
OPEN LF-20 AND PASTE AS A NEW LAYER - RESIZE 50%
AND DRAG TO THE BOTTOM ABOVE THE MASK
DUPLICATE - IMAGE MIRROR AND FLIP
MERGE TOGETHER
 
OPEN LF-19 AND PASTE AS A NEW LAYER AND RESIZE 85%
DUPLICATE - IMAGE FLIP AND MIRROR AND MERGE TOGETHER
OPEN LF-42 AND PASTE AS A NEW LAYER AND DROP SHADOW - MOVE BELOW THE BOW LAYER
OPEN LF-46 AND ESIZE 60% AND PASTE AS A NEW LAYER AND POSITION - ADD DROP SHADOW OF CHOICE
ADD COPYRIGHT AND UR MARK AND SAVE AS A .PNG
 
IF YOU HAVE ANY QUESTIONS REGARDING THIS TUTORIAL PLS LEAVE A MESSAGE IN THE CHAT
BOX OR EMAIL ME AT clare_33@live.co.uk
THANKS AND ENJOY!

Saturday 18 August 2012

TOXICITY


( CLICK PREVIEW FOR FULL SIZE )
THIS TUTORIAL WAS WRITTEN BY ME ON
AUGUST 18TH 2012
IT ASSUMES YOU HAVE WORKING KNOWLEDGE OF PSP AND ANIMATION SHOP
ANY RESEMBLENCE TO ANY OTHER TUTORIAL IS PURELY COINCIDENTAL
THIS WAS MADE USING VERSION 9 OF PSP BUT CAN BE DONE IN OTHERS

YOU WILL NEED:

SCRAP KIT 'TOXICITY' WHICH YOU CAN DOWNLOAD FROM KITTZ KREATIONZ
TUBE OF CHOICE, I AM USING THE WORK OF KEITH GARVEY AND YOU NEED A LICENCE
TO USE HIS WORK FROM GARV GIRLS
TEMPLATE 368 BY MISSY, WHICH YOU CAN DOWNLOAD FROM DIVINE INTENTIONZ
EYE CANDY 4000 - GRADIENT GLOW
MY SUPPLIES HERE

ON TO THE TUTORIAL:

OPEN THE TEMPLATE AND DUPLICATE THEN CLOSE
UNHIDE THE BACKGROUND LAYER AND DELETE THE COPY RIGHT LAYER
IMAGE - CANVAS SIZE 700X700 - REFILL THE BACKGROUND WHITE
HIGHLIGHT THE LARGE CIRCLE LAYER - SELECTIONS - FLOAT
OPEN PAPER1 AND PASTE AS A NEW LAYER - SELECTIONS - INVERT AND HIT DELETE
DELETE THE ORIGINAL LARGE CIRCLE LAYER
HIGHLIGHT CIRCLE1 LAYER - SELECTIONS - FLOAT - OPEN T-P5 AND PASTE AS A NEW LAYER
SELECTIONS - INVERT AD HIT DELETE - DELETE THE ORIGINAL LAYER
CLICK ON THE LARGE CIRCLE AGAIN AND APPLY A SMALL BLACK GLOW AND REPEAT WITH THE
OTHER CIRCLE
HIGHLIGHT WORDART LAYER AND COLORIZE TO GREY
REPEAT THE COLORIZE WITH BOTH THE THIN RECTANGLES
CLICK ON THE CENTRE RECTANGLE - SELECTIONS - FLOAT - ADD A NEW RASTER LAYER
AND FLOOD FILL WITH A COLOUR FROM ANOTHER PAPER - DELETE ORIGINAL LAYER
ADD THE GRADIENT GLOW TO ALL 3 RECTANGLES
MERGE THE WORD ARTS TOGETHER AND MOVE TOWARDS THE BOTTOM
ADD THE GLOW TO IT
HIGHLIGHT THE LEFT FRAME BACK - SELECTIONS - FLOAT - MODIFY - CONTRACT BY 5
OPEN TUBE AND COPY AND PASTE AS A NEW LAYER - INVERT AND HIT DELETE
ADD THE GLOW TO THE FRAME
REPEAT WITH THE OTHER FRAME
CLICK ON THE LARGE CENTRE RECTANGLE - SELECTIONS - FLOAT - OPEN T13 AND PASTE AS
A NEW LAYER  INVERT AND HIT DELETE
OPEN UP MAIN TUBE AND PASTE AS A NEW LAYER- DRAG BELOW THE SEDUCTION LAYER
AND ADD A DROP SHADOW OF CHOICE
OPEN T32 AND PASTE AS A NEW LAYER AND POSITION ( SEE MINE ) RESIZE 60%
OPEN T37 AND PASTE AS A NEW LAYER AND POSITION TOP LEFT AND DRAG TO THE BOTTOM ABOVE THE BACKGROUND
DUPLICATE - FLIP - MIRROR AND MERGE DOWN TOGETHER
OPEN T336 - RESIZE 60% AND PASTE AS A NEW LAYER BEHIND THE CAN
OPEN T21 AND PASTE AS A NEW LAYER AND DRAG BELOW THE THIN RECTANGLE
OPENT16 AND PASTE AS A NEW LAYER - RESIZE 60% 3 TIMES THEN MOVE ONTO THE SMALL RECTANGLE
DUPLICATE - PLACE ALONG THE LINE
MERGE ALL GEMS VISIBLE
DUPLICATE AND PLACE ON THE LOWER RECTANGLE
DUPLICATE TWICE AND RENAME  SPARKLE1, 2 AND 3
CLICK ON SPARKLE ONE AND PASTE THE SPARKLE SUPPLIED ONTO FIRST GEM AS A NEW SELECTION
REPEAT WITH THE OTHERS MISSING 2 EACH TIME
CLICK ON SPARKLE 2 AND PASTE THE SPARKLE AS NEW SELECTION ONTO THE 2ND SPARKLE
AND AGAIN MISSING 2
REPEAT WITH SPARKLE 3 STARTING WITH THE THIRD
REPEAT THE ABOVE STEPS WITH THE LOWER SET OF GEMS
( YOU MAY NEED TO HIDE THE MAIN TUBE TO MAKE IT EASIER TO PLACE )
RESIZE ALL LAYER 80%
ADD THE COPYRIGHT AND ANY TEXT YOU WISH
HIDE SPARK LAYERS 2 AND 3 AND COPY MERGED AND PASTE INTO ANIMATION AS A NEW ANIMATION
UNHIDE
HIDE SPARKLE LAYERS 1 AND 3 AND COPY MERGED AND PASTE AFTER CURRENT FRAME IN ANIMATION SHOP
UNHIDE
HIDE SPARKLE LAYERS 1 AND 2 AND COPY MERGED AND PASTE AFTER CURRENT FRAME IN ANIMATION SHOP
VIEW ANIMATION AND SAVE AS A .GIF
IF YOU HAVE ANY QUESTIONS REGARDING THIS TUTORIAL PLS LEAVE A MESSAGE IN THE CHAT
BOX OR EMAIL ME
THANKS AND ENJOY!


Friday 17 August 2012

FINALLY DONE

Finally ... I have finished re-adding everything....
now time to start creating again! :)

WINTER BLUES


This tutorial was written by me on 29th November 2010 It assumes you have working knowledge of PSP and Animation Shop and it's tools, was written in Version 9, feel free to merge layers as when needed, unless otherwise stated
You will need:
Scrap Kit 'Winter Blues' which you can download here
Tube of choice, I am using the work of Elias Chatzoudis and you will need alicence to use his work
Vanderlee ~ Snowflakes
Visman Sparkle

On to the tut

Open a new transparent image 600 x 600 and flood fill white > open element56 from the kit and paste as a new layer > image resize > 65% > all layers un checked
using your magic wand tool click inside the frame > modify expand > 5 > open paper3 and paste as a new layer > invert and hit delete > select none > drag the paper below the frame
resize the frame and paper > 80% > duplicate both > mirror both
use your deform tool to rotate both slightly at angles
use your magic wand tool and click inside both of the frames > modify > expand > 3
open element45 and paste as a new layer > invert and hit delete > lower opacity to around 75
open element52 > resize 25% > position in the frames > duplicate > use your deform tool to straighten them > when happy merge the trees visible and add a drop shadow of choice
using your freehand selection tool draw around each of the frames insides > effects > plug ins > vanderlee > snowflakes, settings:amount 20 > all other keep at default
hide the background layer > merge visible > drop shadow
open your tube of choice and paste as a new layer > position > drop shadow
activate the bottom layer > open paper13 and paste as a new layer > apply mask of choice > merge group
open element45 and paste as a new layer above the mask > using your eraser tool erase any that overhanging the bottom of the tag > duplicate > image > mirror
open element34 > resize 55% and paste as a new layer on the right hand side of the tag below your tube ( see mine ) duplicate > resize 80% and position other side > drop shadow both and merge together
open element13 > resize > 35% and paste at the bottom of the left frame to cover the rose stems > drop shadow
open element46 and paste as a new layer over the tag and place below the tube layer
activate te layer with the frames > duplicate twice and rename 1, 2 and 3
on layer one > visman > sparkle > settings of choice
layer 2 > same but change random seed
layer 3 > same but change random seed
add copyrights > your mark and any text you would like > resize if you wish
hide layers 2 and 3 and copy merged and paste into animation shop
hide layers 1 and 3 and copy merged and paste after current frame
hide ayers 1 and 2 and copy merged and paste after current frame
view animation and save as a .gif
If you have any questions or comments regarding this tutorial , please leave me a comment below or write a message
in my Chat Box, alternatively you can email me at clare_33@live.co.uk

WILD SIDE


 This tutorial was written by me on December 24th 2009
This tutorial assumes you have knowledge of psp and it's tools, was written in version 9
you will need:
Template140 by Beth at Blissfully Beth
FTU Scrap Kit by bea at Bea Creations blog not found at time of re-adding tutorial
Tube of choice, I am using Elias Chatzoudis, you will need a licence
Eye Candy4000 - Gradient Glow
My Supplies here

open the template and duplicate, close the original, delete the copyright and the background layers
image > resize 80% all layers > image > canvas size 650 x 650
click on lg black oval > selections > select all > selections > float > selections > defloat
open paper6 and paste as a new layer > selections > invert and hit delete, delete the original layer
click on outer blue oval and float ( as step above ), open paper5 and paste as a new layer > selections > invert and hit delete, delete the original layer
repeat the above steps with the other blue frames, using the same paper

click on the word art glitter and colorize to grey
click on the dots and float, open paper2 and paste as a new layer > selections > invert and hit delete, delete the original
click on the wide side word art > float and open paper2 and paste as a new layer > selections > invert and hit delete, delete the original layer
effects > texture > blinds > settings: 2, 50, black, horizontal > ok
merge down the wordart and the glitter together
add the same blinds to the outer oval frame layer and add a drop shadow of choice

click on the inner white oval and float, open paper1 and paste as a new layer > selections > invert and hit delete on your keyboard
click on square 1 bg and float > open paper10 and paste as a new layer > selections > invert and hit delete, delete the original, repeat with the other box using the same paper
using your magic wand click inside the top frame > expand > 2
open your tube of choice, resize if needed and paste as a new layer > invert and delete
drag the tube layer below the frame layer and add a drop shadow
repeat the above steps with the other framed box

change the blend mode on both tubes to soft light, open the tube again and paste as a new layer, add a drop shadow and position
add a drop shadow to the dots and to both small square frames
open the glitter supplied and paste as a new layer, drag to the bottom
open the string from the kit and resize by 85% and paste as a new layer ( see mine ) add a drop shadow

open guitar2 and resize 85% and copy and paste as a new layer ( see mine ) add a drop shadow
add a small white glow to the wordart layer
and move down ( see mine )
merge all layers visible and add a new layer and drag to the bottom, flood fill white
add the copyrights, your mark and any text you would like
image > resize > all layers 80% and cropa round tag, open animation shop

open up the bling supplied and delete the black frame, duplicate your tag until you have 21 frames, click on frame1 and edit > select all
click on frame 1 of the bling > edit select all, now holding your mouse button, drag the bling over to the tag, position on the centre of the letter D and release your button
view animation and save

WHAT A GIRL WANTS


This tutorial was written by me on october 21st 2009

you will need:

template 257 by Missy here
scrap kit called 'sexy, toxic and exotic' by Lacarolita here
a tube of choice, i used the work of keith garvey, you will need a licence to use his work

1. open the template, duplicate and close the original
2. remove the copyright layer, image > canvas size > 700 x 700 we can resize later, fill the bottom layer white
3. activate the oval layer, selections > select all > selections > float > selections > defloat4. open up paper
4 and paste as a new layer, selections > invert hit delete, select none, delete the original oval layer
5. activate the thin rectangle and repeat steps 3 and 4 using paper 7, selections > invert hit delete, select none, delete the original layer
6. activate thin rectangle 2 and repeat steps 3 and 4 using paper 4, selections > invert hit delete, select none, delete the original layer
7. activate thin rectangle 3 and repeat steps 3 and 4 using paper 1, selections > invert hit delete, select none, delete the original layer
8. add a drop shadow to these 3 rectangles
9. duplicate the oval layer and on the original > blur > gaussian > 10.00
10. with your magic wand activate the frame background 1, open up your tube and paste as a new layer, position, invert > hit delete, select none
11. repeat step 10 for frame background 2, open up your tube and paste as a new layer, position, invert > hit delete, select none
12. add a drop shadow to both tubes
13. activate the bottom layer and open up glitter 2 and paste as a new layer, duplicate > image > mirror > image flip, see mine for placement
14. open up lipstick 1 and resize, paste as a new layer to the left hand side and move below the word art layer
15. open up the bow1 and resize and place at the top of the tag
16. open up your tube and again and paste as a new layer, add a drop shadow
17. add the credits to the tag, crop and save

USA SOCCOR BABE


This tutorial was written by me on 17th June 2010 It assumes you have working knowledge of PSP and Animation Shop and it's tools, was written in Version 9, feel free to merge layers as when needed, unless otherwise stated
You will need:
The awesome 'USA' scrap kit by tamie, which can be downloaded from Addictive Pleasures
kit here
Tube Of choice, I am using the work of Elias Chatzoudis and you will need a licence to use his work
Eye Candy Impact 5 - Gradient Glow
Eye Candy 4000 - hsb Noise

Open a new transparent image 600 x 600 ( crop later ) flood fill white
open frame4 and paste as a new layer > resize > 65% > all layers unchecked
click inside using your magic wand tool > expand > 3 > open paper3 and paste as a new layer > invert and delete and drag below the frame layer
click inside the frame again > expand 3 > open tube and paste as a new layer > invert and delete >invert and again paste the tube again but mirrored > invert and delete > select none
merge down the 2 tube layers and change blend mode to luminance
Hide the background layer and merge visible > resize 75% and move to the bottom a bit ( see mine )
open goalpost and resize 75% and paste as a new layer behind the image u just made
open main tube and paste as a new layer > drop shadow of choice
open flag and resize 75% > paste as anew layer and position ( see mine )
open text2 and paste as a new layer > resize 75% and paste as a new layer and position
( see mine )
effects > eye candy 5 -impact > add small black gradient glow
open flag and paste as a new layer and position behind the goal post > drop shadow
open fireworks and paste as a new layer and position behind ( see mine )
duplicate twice and rename 1, 2 and 3
click on layer 1 add noise > settings: uniform, monochrome - 40
click on layer 2 add noise > same but 45
click on layer 3 add noise > same but 50

click on the wordart and duplicate twice and rename these also 1, 2 and 3
click on 1 and go to eyecandy - hsb noise and use default settings
click on 2 and repeat but change the random seed
click on 3 and repeat but change the random seed
add the copyright and your mark and any text you like
click on the background layer > open paper8 and paste as a new layer > apply mask of choice
hide both 2 and 3's and copy merged into animation shop
unhide 1's
hide both 1 and 3's and copy merged and paste after current frame in animation shop
unhide 2's
hide 1 and 2's and copy merged and paste after current frame in animation shop
view animation and save as a .gif
If you have any questions or comments regarding this tutorial , please leave me a comment below or write a message
in my Chat Box, alternatively you can email me at clare_33@live.co.uk

TWILIGHT


This tutorial was written by me on November 8th 2009

You will need:
at least 4 images all matching
mine supplied for the Twilight tag I am making
pentacom dot
My Supplies here

open up a new transparent image 600 x 400
to make a blend tag the first thing we need to do is prepare the images for this.

open 'Twilight1' in psp, image > resize > 80% and right click in your layer pallete, choose promote background layer
(the image must be a raster layer to be able to blend it).

select your freehand selection tool with the following settings: point to point, replace, feather 40
outline around Edward.

selections > invert and hit delete on your keyboard, this will delete alot of the background, each time you hit delete you will delete a bit more, press delete til you are happy with it.
I hit delete twice
** you can also save this as a psp tube and use it as a tube if you wish. **

copy and paste twilight1 onto your canvas and place towards the left ( see mine for placement )
open 'Twilight2'
draw around Bella > selections > invert and hit delete once

copy and paste this onto your canvas and place towards the right hand side
( see mine for placement )

activate the bottom layer and selections > select all
open the 'newmoon' and copy and paste into selection
select none

add a new layer above the new moon layer and flood fill with black
effects > plug ins > pentacom dots
with these settings: 255, 11, 255, 255, 255
lower the opacity to around 25

set both colours to white and select your preshape tool set to rectangle
draw a rectangle going vertical ( see mine )
convert to raster and send this layer to the top

make your background black and fill null, click on your preshape tool again
set the line style to dots and width 1.0
draw a rectangle in the white one.

merge these 2 layers together and lower the opacity to around 36
change the black to white in your colour pallete
and using the same settings as before draw a rectangle just around the outside edge

activate the edward layer and change the blend mode to luminance legacy
repeat this with the bella layer
open up the sparkles png and paste as a new layer on top, and place inside the white rectangle

open up the font and change background to black, fill to white
activate your text tool with these settings:
create as vector, width 1.0, size 72

type the your text and place towards the bottom left, size it how to like and convert to raster
add a drop shadow settings: 2, 2, 76, 5.0, black
change the blend mode to soft light

image > resize 85%
and save as a .jpeg

If you have any questions or comments on this tutorial, please leave me a message in my chat box.

THINKING PINK


This tutorial was written by me on 31st October 2010 It assumes you have working knowledge of PSP and Animation Shop and it's tools, was written in Version 9, feel free to merge layers as when needed, unless otherwise stated

You will need:
Scrap Kit 'Think Pink' by Tamie with you can download from Addictive Pleasures
Tube of choice, I am using the work of Elias Chatzoudis, you will need a licence to use his work

Open a new transparent image 600 x 600 and flood fill white
open element31 and paste as a new layer > resize 60%

click inside the frame using your magic wand ; modify; expand 3

open p1 and paste as a new layer ; invert and hit delete ; drag below the frame
click inside the frame again using your magic wand, open tube of choice ( preferrably a close up )

and paste as a new layer ; invert and hit delete; change blend mode to luminance legacy and lower the opacity to around 65

add your other tube of choice and paste as a new layer; add drop shadow of choice
open element 54 and paste as a new layer &; resize 55% position to the right hand side of frame > using eraser erase any over hangs ; duplicate ; image ; mirror

open element59 and paste as a new layer &; resize ; 80% twice and paste over the paper background.. use your eraser tool to erase any over the frame
add a drop shadow of choice on the frame

open element15 and resize ; 60% and paste as a new layer and position ( see mine ) add drop shadow of choice

delete the background layer ; add copyrights and your mark and any tetx you like t; merge visible and save as a .png

If you have any questions or comments regarding this tutorial , please leave me a comment below or write a message
in my Chat Box, alternatively you can email me at clare_33@live.co.uk

SPOOKY


This tutorial was written by me on 16th October 2010 It assumes you have working knowledge of PSP and Animation Shop and it's tools, was written in Version 9, feel free to merge layers as when needed, unless otherwise stated

You will need:
Template101 by Toxic Desirez

tube of choice, I am using the work of Elias Chatzoudis, you will need a licence to use his work
Eye Candy impact - gradient glow
You can get my supplies
here
Open the template and duplicate > close the original, delete copyright layer > image canvas size 650 x 650
using your colour pick tool select 2 colours from your tube and set the gradient to background-foreground
highlight the rectangle layer > float > defloat > add a new layer and flood fill with gradient > delete the original layer
highlight the circle layer > float > defloat > add a new layer and flood fill with colour of choice > delete original layer
highlight the bats layer > adjust > brightness and contrast and move sliders until the bats go black
repeat with the wordart, dotted rectangle also
highlight the rectangle layer again > float > defloat
open tube of choice and paste as a new layer and position > invert and hit delete > duplicate > image > mirror and lower opacity to around 30 and merge the 2 tubes together
using your selection tool draw around the dotted rectangle > invert > while on the tube layer hit delete
add a small black glow to the circle and to the word art
open up the main tube and paste as a new layer and position > add drop shadow of choice
open the spider supplied and paste as a new layer and position > drop shadow
add a new layer above the background and flood fill with a colour of choice
apply the mask > merge group
add the copyrights and your mark and any text you like
merge visible your copyrights, text, and tube and then hide
merge visible all other layers
you should now only have 2 layers
hide the top layer and copy the bottom and paste into animation shop
duplicate until you have 13 frames matching the animated spider
add the animated spider to your tag
go back to psp and copy the other layer and paste into animation shop > duplicate 13 frames and add to the tag
resize if needed > find the centre frame where the spider is at the bottom and change the frame properties to around 120
view animation and save as a .gif

If you have any questions or comments regarding this tutorial , please leave me a comment below or write a message
in my Chat Box, alternatively you can email me at clare_33@live.co.uk

SPELLS


This tutorial was written by me on 31st October 2010 It assumes you have working knowledge of PSP and Animation Shop and it's tools, was written in Version 9, feel free to merge layers as when needed, unless otherwise stated
You will need:
My supplies here
A tube of choice, I am using the work of Elias Chatzoudis and you will need alicence to use his work
Eye Candy 5 - Impact - Gradient Glow

Open a new transparent image 600 x 600 and flood fill white
open the frame supplied and paste as a new layer in the centre
using your magic wand click inside the frame > modify > expand > 4
open the image supplied and paste as a new layer > invert and hit delete > drag below the frame layer
open your tube and paste as a new layer > drop shadow of choice and position
open the spider web and paste as a new layer over the centre of your image open up the leaves and paste as a new layer over the frame
add a small black gradient glow to the frame using eye candy impact gradient glow
highlight the web layer and duplicate twice > rename them 1,2 and 3
add the copyrights, your mark and any text you would like
click on 1 > adjust add noise: random, monochrome 50% > ok
click on 2 > same settings but change to 65%
click on 3 > same settings but change 80%
click on 1 again and apply same gradient glow as before > repeat with 2 and 3
hide layer 2 and 3 and copy merged and paste into animation shop
hide layer 1 and 3 and copy merged and paste after current frame
hide layer 1 and 2 and copy merged and paste after current frame
view animation and save as a .gif
If you have any questions or comments regarding this tutorial , please leave me a comment below or write a message
in my Chat Box, alternatively you can email me at clare_33@live.co.uk

SNOWY WINDOW


This tutorial was written by me on 22nd November 2009
You will need:
Scrap Kit 'Winters Coming' by addictive pleasures here

Tube of choice, I am using Elias Chatzoudis, you will need a licence to use his work
Tiny Star here

open a new transparent image 600 x 600 and flood fill white
open ele9 and copy and paste as a new layer > image > resize > 55% and place top centre on your canvas
add a drop shadow, setings: 3, 3, 61, 13, black
open ele8 and copy and paste as a new layer and place behind the window, select your selection tool set to rectangle and draw around the window > selections > invert and hit delete
rename these layers window and cloud
open ele45 and copy and paste as a new layer and place at the top of the window, using your selection tool, delete the excess
add the same drop shadow as before
open ele15 and copy and paste as a new layer and place behind the window > image > resize > 55% and again using your selection tool, delete any tree over hanging the window
rename this layer tree
merge down the top beading to the window layer
open ele13 and copy and paste as a new layer > image > resize > 75%
add the same drop shadow
move towards the bottom left of the window
open up your tube and copy and paste as a new layer > image > resize > 80%
add the drop shadow
image > mirror and place so she covers the bottom of the tree
using your selection tool, select a rectangle just around the inside of the window frame
open ele5 and copy and paste as a new layer > selections > invert > hit delete
drag this layer to below the window and rename snow1
using your selection tool, select a rectangle just around the inside of the window frame
open ele5 and copy and paste as a new layer, use your mover tool to move it into a different position to the last snow layer.
selections > invert and hit delete, rename this snow2 and drag below the window
using your selection tool select a rectangle just around the inside of the window frame
open ele5 and copy and paste as a new layer, use your mover tool to move it into a different position to the other 2 snow layers, rename this snow3, and drag below the window
duplicate the tree layer and rename them tree1, tree2 and tree3
open the tiny star from the supplies and file > export > picture tube and name sparkle
click on your picture tube tool and select the sparkle, select tree1 and place a few sparkles on it
select tree2 and place some sparkles in a different place around the tree
do the same with tree3
open ele34 and copy and paste as a new layer and drag to the bottom of the pallet, move it so it over hangs the window, add the drop shadow
duplicate and flip and merge these 2 layers down
select your selection tool and draw around the window and while on the snowflake layer hit delete
image > resize > 80% all layers
add your mark and the copy rights
crop around your tag and add any text that you would like
open animation shop
hide tree2, tree3, snow2 and snow3 and copy merged and paste into animation shop as a new animation
hide tree1, tree3, snow1 and snow3 and copy merged and paste in animation shop after current frame
hide tree1, tree2, snow1 and snow2 and copy merged and paste into animation shop after current frame
view animation and save

SNOW BOARD


THIS TUTORIAL WAS WRITTEN BY ME ON NOVEMBER 12TH 2011
ANY RESEMBLENCE TO ANY OTHER TUTORIAL IS PURELY COINCIDENTAL
IT ASSUMES YOU HAVE WORKING KNOWLEDGE OF PSP AND ANIMATION SHOP AND ITS TOOLS

YOU WILL NEED:

SCRAP KIT 'SNOWBOARD' BY MELISSA WHICH YOU CAN GET HERE
TUBE OF CHOICE, I AM USING THE WORK OF KEITH GARVEY AND YOU WILL NEED A LICENCE TO USE HIS WORK

ON TO THE TUTORIAL:

OPEN A TRANSPARENT IMAGE 700X700 AND FLOOD FILL WHITE
SELECT YOUR SELECTION TOOL SET TO CIRCLE AND DRAW OUT A CIRCLE
OPEN A PAPER OF CHOICE AND PASTE AS A NEW LAYER - SELECTIONS S- INVERT AND HIT DELETE
SELECTIONS - FLOAT - EXPAND - 5 ON THE CIRCLE
OPEN ANOTHER PAPER OF CHOICE AND PASTE AS A NEW LAYER
INVERT AND DELETE
MERGE THESE 2 LAYERS TOGETHER AND POSITION TOP LEFT OF YOUR IMAGE
DRAW ANOTHER CIRCLE A BIT SMALLER AND REPEAT THE ABOVE STEPS USING DIFFERENT PAPERS
SELECT THE BIGGER CIRCLE AND FLOAT - OPEN THE CLOSE UP TUBE AND PASTE AS A NEW LAYER - POSITION - INVERT AND HIT DELETE
REPEAT WITH THE OTHER CIRCLE USING A DIFFERENT TUBE
CHANGE THE BLEND MODE OF BOTH THE TUBES TO OVERLAY
HIDE THE BACKGROUND LAYER AND MERGE LAYERS VISIBE - UNHIDE BACKGROUND
OPEN THE BLACK BOW FROM THE KIT AND PASTE AS A NEW LAYER - DROP SHADOW
DROP SHADOW CIRCLES
OPEN THE SEQUINS AND PASTE AS A NEW LAYER AND DRAG TO THE BOTTOM - DUPLICATE TWICE AND POSITION BEHIND THE CIRCLES - MERGE SEQUINS TOGETHER - DROP SHADOW
OPEN THE SNOWFLAKE AND POSITION - DROP SHADOW
OPEN A PAPER OF CHOICE AND PASTE ABOVE THE WHITE BACKGROUND - APPLY A MASK
CLICK ON THE SNOWFLAKE LAYER AND RENAME 'SNOWFLAKE' DUPLICATE TWICE AND RENAME THEM 1,2 AND 3
HIGHLIGHT SNOWFLAKE1 AND ADD A NOISE OF CHOICE 30%
HIGHLIGHT SNOWFLAKE 2 AND ADD NOISE 40%
HIGHLIGHT SNOWFLAKE 3 AND ADD NOISE 50%
OPEN THE THRILL WORD ART AND PASTE AS A NEW LAYER - DROP SHADOW
ADD ANY TEXT YOU LIKE - WATERMARK AND COPYRIGHTS
CROP AROUND THE TAG AND RESIZE 85% ALL LAYERS
HIDE SNOWFLAKE 2 AND 3 - COPY MERGED AND PASTE INTO ANIMATION SHOP
UNHIDE
HIDE SNOWFLAKE 1 AND 3 - COPY MERGED AND PASTE AFTER CURRENT FRAME
UNHIDE
HIDE SNNOWFLAKE 1 AND 2 - COPY MERGED AND PASTE AFTER CURRENT FRAME
VIEW ANIMATION AND SAVE AS A .GIF
IF YOU HAVE ANY QUESTIONS PLEASE EMAIL ME

SHOOT


This tutorial was written by me on 12th June 2010, It assumes you have working knowledge of PSP and Animation Shop and it's tools, was written in Version 9, feel free to merge layers as when needed, unless otherwise stated

You will Need:
Tube Of choice, I am using the work of Elias Chatzoudis and you will need a licence to use his work
My Template
My Supplies here
Fonts Sports Night ( supplied )
Eye Candy 4000 - Gradient Glow
*************************************************************************8

Open the template and duplicate and close the original > delete the copyright layer > image > canvas size > 700 x 700 ( crop later )
using your magic wand click inside blkframeinner1 > modify > expand 2 > open paper2 and paste as a new layer > invert and delete > delete the original
repeat with blkframeinner2

click inside blkframe1 with your magic wand > open tube and paste as a new layer > invert and delete > duplicate tube > blur > gaussian 3 > change blend mode to overlay and merge down with the original tube > repeat with the other frame
click on grey circle > selections > float > defloat > open paper1 and paste as a new layer > invert and delete > delete the original
click on the red circle you just made > selections > float > defloat > paste your tube as a new layer > invert and delete > change the blend mode to soft light and lower the opacity to around 80
open your main tube and paste as a new layer and position > drop shadow
set your foreground and background to black and draw out a rectangle ( see mine ) convert to raster
type your text > I typed England > create as vector so you can stretch it to fit your rectangle > convert to raster > effects > gradient glow and add a small red glow to your text
merge down to your rectangle > add the same glow to the rectangle > add same glow to the 2 black frames also

add the copyrights, your mark and your text > merge visible > crop > resize 85% all layers
copy and paste into animation shop > open the football
add the football to your tag > view and save as a .gif
If you have any questions or comments regarding this tutorial please leave me a comment below or write a message
in my Chat Box, alternatively you can email me at clare_33@live.co.uk

SHE'S SO DANGEROUS


This tutorial was written by me on 7th December 2009

You will need:
Template291 by Missy here
Tube of choice, I used Elias Chatzoudis, you will need a licence to use his work here
Scrap Kit 'Minx Attitude' By Tamie here
mask of choice
Pentacom - Dot and Cross

open the template and duplicate and close the original
delete the copyright layer and the background layer
image > resize > 80% all layers
image > canvas size > 650 x 650
click on the oval layer > selections > select all > selections > float > selections > defloat
open MApaper1 and copy and paste as a new layer > selections > invert and hit delete, delete the original layer > selections > select none
effects > plug ins> pentacom > dot and cross, settings: 72, 10, 2
click on rectangle2 > selections > select all > selections > float > selections > defloat
open MApaper3 and paste as a new layer > selections > invert and hit delete, delete the original layer
repeat with rectangle1 > drop shadow, settings: 2, 2, 70, 5.0, black, add same drop shadow to rectangle2
click on circle > selections > select all > selections > float > selections > defloat, open MApaper6 > image > resize > 80% > selections > invert and hit delete, delete the original layer
click on large dangerous and using your magic wand click inside each of the letters and flood fill with black
click on the shes so layer > selections > select all > selections > float > selections > defloat and flood fill black
delete the dangerous layer ( the small words )
click on the dotted line > selections > select all > selections > float > selections > defloat, select your brush set to circle and fill them in with black > select none
open your tube and paste as a new layer, add a drop shadow of choice, click on the star2 and send it to the top above the tube
add a drop shadow of choice to the circle layer
open scatters3 and copy and paste as a new layer under all the layers, using your selection tool, erase any overhanging at the bottom, add a drop shadow
open glitterspat4 and copy and paste as a new layer at the bottom > image > resize 80%
open curlyribbon2 > image > resize > 80% and paste as a new layer and place ( see mine )
add a small glow to the 'shes so' and merge down with the 'dangerous'
bring the dangerous layer to the top
crop around the tag > image > resize 80% > all layers
add the copyrights and your mark
merge all layers visible
copy and paste the top layer into animation shop as a new animation
click your magic wand and click inside the D > selections > modify > expand > 2, and flood fill with a colour from the tube
copy merged and paste after current frame
click your magic wand and click the letter A > selections > modify > expand > 2 and flood fill again
copy merged and paste after current frame
repeat this until all letters are filled with your colour
i used impact and mistral for my text
change the frame properties to 20
view animation and save

SEXY SUMMER


This tutorial was written by me on 5th July 2010 It assumes you have working knowledge of PSP and Animation Shop and it's tools, was written in Version 9, feel free to merge layers as when needed, unless otherwise stated

You will need:
Template 82 by Beth which you can download from Blissfully Beth
Scrap Kit ' Summer Feeling' which you can purchase from Bea Creations
blog not found at time of re-adding tutorial
Tube Of Choice, I am using the work of Elias Chatzoudis, you will need a licence to use his work
Mask Of Choice, I used mask84 by WSL from Weescotlass
Eye Candy 5 Impact - Gradient Glow

Open the template and duplicate ~ close the original
delete the copyright layer ~ resize all layers 85%
highlight bg layer ~ open paper2 and paste as a new layer ~ apply mask ~ merge group
highlight blue circle frame ~ float ~ defloat ~ open paper16 ans paste as a new layer ~ invert and hit delete ~ delete original layer
add a small gradient glow
highlight grey circle ~ float ~ defloat ~ open paper14 and paste as a new layer ~ invert and hit delete ~ delete the original layer
highlight black circle ~ float ~ defloat ~ open paper8 and paste as a new layer ~ invert and hit delete ~ delete the original layer
add the same gradient glow
merge down 1 and 2
float ~ defloat ~ open paper11 and paste as a new layer ~ invert and hit delete ~ delete the original ~ add the gradient glow
highlight heart ~ float ~ defloat ~ open paper13 and paste as a new layer ~ invert and delete and delete the original layer
highlight the centre circle layer again ~ float ~ defloat ~ open tube and paste as a new layer ~ invert and hit delete
modify ~ contract20 ~ invert and hit delete
duplicate the tube ~ top layer ~ blur ~ gaussian 3.0 ~ change blend mode to overlay ~ merge down with original tube ~ drop shadow
lower opacity to around 70
highlight heart frame ~ float ~ defloat ~ add a new layer ~ and flood fill with a colour from your tube ~ delete original layer
add the gradient glow
delete sexy summer layer
open heartstring01 and paste as a new layer ~ position ~ drop shadow
resize mask layer 85% ~ duplicate ~ flip ~ mirror ~ merge down
open flower05 and paste as a new layer ~ resize 60% and position over the heart ~ drop shadow
highlight the strips ~ effects ~ weave ~ settings: 1, 6, 1, black for both, fill gaps checked
open doddle03 and paste as a new layer ~ position ~ drop shadow
open main tube and paste as a new layer if using the same tube as me, you will need a block style font to make it look like she is leaning on the text ~ i used Big Apple MF ~ drop shadow
add copyrights and your mark ~ crop around tag ~ resize all layers 85%
if you have any questions or comments regarding this please leave me a comment below or write a message
in my Chat Box, alternatively you can email me at clare_33@live.co.uk

SEX KITTEN


This tutorial was written by me on May 30th 2010, It assumes you have working knowledge of psp and animation shop and it's tools, was written in version 9

You will need:
Template170 by Beth which you can download from Blissfully Beth
tube of choice, I am using the work of PaulaAG which can be found at my group BritsyNin
Eye Candy4000 - Gradient Glow
My Supplies here

open the template and duplicate and close the original, delete the copyright layer and the background and replace the background with a white layer
click on the white circle > float > defloat > delete open paper1 supplied and paste as a new layer > invert and delete > select none
click on black circle frame > adjust add noise: Gausian, Monochrome, 50
click on pink frame1 > float > defloat > open paper2 and paste as a new layer > invert and delete, repeat with the other pink frames
click on word art > adjust > colorize: 0, 0 > repeat with circles
click inside black frame1 > open your tube and paste as a new layer ( resize if you wish ) invert and delete
repeat with the other black frames, using different parts / tubes > change blend modes to luminance legacy
click on checkered lines and add a small white gradient glow
open gem heart and paste as a new layer ( see mine )
open glitter circle and paste as a new layer > drag to the bottom and position just above the circle > duplicate > flip > merge down > drop shadow
add the copyrights and your mark and any text you would like > delete the white background > merge visible and save as a .png
If you have any questions or comments regarding this tutorial , please leave me a comment below or write a message
in my Chat Box, alternatively you can email me at clare_33@live.co.uk

SANTA COOKIES


This tutorial was written by me on November 16th 2009
You will need:
Tube of choice, I am using Keith Garvey and you need a licence to use his work here
word art by Chas here blog not found at time of re-adding tutorial
Template93 by Ali here blog not found at time of re-adding tutorial
Scrap kit 'Ho! Ho! Ho!' here
open the template and duplicate and close the original, delete the copyright layer
image > canvas size > 650 x 650
activate the bottom and adjust > hue and saturation > colorize and choose a colour from your tube
using your magic wand activate the large black rectangle, open paper5 and copy and paste as a ne wlayer > selections > invert and hit delete on your keyboard, delete the original black rectangle layer
click on your colours and make one of them #0a3f0b, activate the inner tree layer and flood fill
now choose colour #1c670b and activate the outer tree layer using your magic wand and flood fill
on the same outer tree layer > adjust > add/remove noise > with these settings:
gaussian, monochrome checked, 55%
merge down the two tree layers together
using your magic wand activate the large grey frame and flood fill with the same green and again add the noise to it
repeat this is the white frame
using your magic wand click inside the large grey box and open paper10 and copy and paste as a new layer > selections > invert and hit delete on your keyboard
merge down the frame and the box on the left
open your tube and place to the left hand side of the box ( see mine )
add a drop shadow with these settings: 1, 3, 45, 5.0, black
open the train and resize by 75% and paste as a new layer, place to the right ( see mine ) add the same drop shadow as before
open ribbon3 and copy and paste as a new layer, drag to below the tube and the tree and cut off the excess ( see mine ) add the same drop shadow again
open the holly border and paste as a new layer and add the same drop shadow ( see mine )
open stocking and resize by 55% and paste as a new layer over the tree ( see mine ) add a drop shadow
image > rotate > free rotate > right > 33
adjust > sharpen
open crissyball2 and resize by 25% and paste as a new layer onto your tree, duplicate a few times and place them on the tree also
open 3 gifts from the scrap kit and resize by 30% paste onto your canvas on the right hand side, add the same drop shadows to each
crop around the tag and add your mark and copyrights
image > resize > 85% all layers
open the word art and resize 85% copy and paste as a new layer and lower the opacity to around 75
merge all layers visible and add your text of choice
save as a .png

PURPLE CHRISTMAS


THIS TUTORIAL WAS WRITTEN BY ME ON NOVEMBER 10TH 2011, IT ASSUMES YOU HAVE WORKING KNOWLEDGE OF PSP AND IT'S TOOLS.

ANY RESEMBLENCE TO ANY OTHER TUTORIAL IS PURELY COINCIDENTAL

YOU WILL NEED:

TUBE OF CHOICE, I AM USING THE WORK OF RION VERNON FROM PINUP TOONS, YOU WILL NEED A LICENCE TO USE HIS WORK

SCRAP KIT 'A MISFIT XMAS' BY TINA .. HER SITE

ON TO THE TUTORIAL...
1. OPEN A NEW TRANSPARENT IMAGE 200 X 500
2. FLOOD FILL WITH A COLOUR FROM YOUR TUBE
( YOU CAN USE A GRADIENT IF YOU PREFER)
3. IMAGE - RESIZE - 50% - IMAGE -ROTATE - 90 - LEFT AND POSITION TO THE LEFT OF YOUR IMAGE
4. ADD A DROP SHADOW OF CHOICE
5. OPEN ABOUT 3 OR TUBES FROM THE SAME ARTIST AND POSITION THEM ON THE IMAGE - POSITION THEM WHERE YOU LIKE - WHEN HAPPY MERGE THEM TOGTHER AND CHANGE THE BLEND MODE TO LUMINANCE LEGACY AND LOWER THE OPACITY TO AROUND 7
6. GO TO EFFECTS - TEXTURE EFFECTS - BLINDS, WITH THESE SETTINGS: 2,28,BLAC
7. USING YOUR FREEHAND SELECTION TOOL SET TO RECTANGLE DRAW OUT A RECTANGLE AT THE BOTTOM RIGHT - HIGHLIGHT THE TUBE LAYER AND CHANGE TO GREY - REPEAT WITHT HE BACKGROUND LAYER
8. SELECTIONS - CONTRACT - 5 - ADJUST BRIGHTNESS A LITTLE BIT
9. DRAW ARUND THE GREY AREA - SELECTIONS - BORDER - 2 - ADD A NEW LAYER AND FLOOD FILL WITH A COLOUR FROM TUBE - SELECT NONE
10. ADD A PAPER TEXTURE OF CHOICE TO THE BACKGROUND
11. MERGE VISIBLE AND MINIMISE
12. OPEN A NEW TRANSPARENT IMAGE 700 X 700 AND PASTE WHAT YOU JUST MADE ONTO IT
13. OPEN LIGHTS AND PASTE AS A NEW LAYER - ERASE ANY OVER HANGS EACH EDGE
14. OPEN SNOWFLAKE1 AND PASTE AS A NEW LAYER AND DRAG TO THE BOTTOM - POSITION TO THE LEFT OF THE TAG - DUPLICATE - MIRROR - FLIP
15. MERGE THESE 2 TOGETHER AND ADD A DROP SHADOW OF CHOICE
16. ADD A NEW LAYER AND DRAG TO THE BOTTOM AND FLOOD FILL WHITE
17. HIGHLIGHT THE RECTANGLE LAYER - SELECTIONS - SELECT ALL - SELECTIONS - FLOAT - DELECTIONS DEFLOAT - MODIFY EXPAND - 7 - ADD A NEW LAYER AND FLOOD FILL WITH A COLOUR FROM YOUR TUBE
18. ADD NOISE OF CHOICE - DROP SHADOW
19. OPEN SPARKLE1 AND PASTE AS A NEW LAYE
20.ADD TEXT OF CHOICE - WATERMARK - COPYRIGHT
21. HIGHLIGHT THE LIGHTS LAYER AND - DUPLICATE TWICE - RENAME THEM LIGHTS 1,2 AND 3
22. HIGHLGHT LIGHT 1 AND WITH YOUR FREEHAND SELECTION TOOL DRAW AROUND THE BULB OF THE 1ST, 4TH, 7TH, 10TH AND 13TH LIGHT
23. ADJUST BRIGHTNESS - 80 - SELECT NONE
24. HIGHLIGHT LIGHT 2 AND WITH YOUR FREEHAND SELECTION TOOL DRAW AROUND THE BULB OF THE 2ND, 5TH, 8TH, 11TH
25. ADJUST BRIGHTNESS - 80 - SELECT NONE
26. HIGHLIGHT LIGHT3 AND WITH YOUR FREEHAND SELECTION TOOL DRAW AROUND THE BULB OF THE 3RD, 6TH, 9TH AND 12TH
27. ADJUST BRIGHTNESS - 80 - SELECT NONE
28. CROP AROUND YOUR TAG AND RESIZE IF NEEDED

29. HIDE LAYERS LIGHTS 2 AND 3 - COPY MERGED AND PASTE INTO ANIMATION SHOP
31. UNHIDE
31. HIDE LAYERS 1 AND 3 AND COPY MERGED AND PASTE INTO ANIMATION SHP AFTER CURRENT FRAME
32. UNHIDE
33. HIDE LAYERS 1 AND 2 AND PASTE INTO ANIMATION SHOP AFTER CURRENT FRAME
34. CHANGE THE FRAME PROPERTIES TO 30 - VIEW ANIMATION AND SAVE AS A .GIF
IF YOU HAVE ANY QUESTIONS REGARDING THIS TUTORIAL, PLEASE EMAIL ME

DUSTY


MOTHERS LOVE

NO PREVIEW

RUBY


MOTHERS DAY


ROUGE


PURPED


OPPOSITES


ICY BLUE


GOING GREEN


FATHERS LOVE


HALLOWEEN


FUDGE


BLACK AND GOLD


PURPLE RAIN


This tutorial was written by me on July 22nd 2009

Supplies you will need:
template #36 by Saras Scraps blog not found at time of re-adding tutorial
mask #84 by  weescotlass
a tube that would look good with rain mine is by JDD Designs from BristyNin
Scrap Kit 'Elenor' by Cinnamon Scraps
A background image
Plug Ins: Vanderlee Snowflakes

Begin by opening up your template and duplicate it (shift+D) to protect the original
image > canvas size > 700 x 700 (to give us room to work) we will crop later
delete the copyright layer
and add a new layer, flood fill with white so we can see what we are working on
open up a paper of choice and paste as a new layer above your white layer
apply the mask and merge group
activate 'rectangle1' > selections > select all > selections > float > selections > defloat
choose a paper of choice and paste as a new layer
selections > invert and hit delete
delete the original rectangle1 layer


repeat these steps for 'rectangle2' and 'rectangle3'add a small drop shadow to all these 3 layers
vertical~2...Horizontal~2...Opacity~50...Blur~5.00...Colour~Black
open up the image supplied by me or one of choice
using your magic wand, click inside the large circle
selections > modify > expand by 3
paste the image as a new layer and place where you like
selections > invert > hit delete on your keyboard
selections > invert and activate the 'circle1' layer and hit delete again
selections > select none

move the image to below the 'circle1'lower the opacity on the image to around 60
activate the right square frame and again repeat the steps above and delete the original black frame repeat with the other frame
add the same drop shadow to the frame layers
hide all the layers except for the mask, and rectangles > layers > merge > merge visible
unhide now hide all layers except the white circle frame and the 2 filled squares > layers > merge > merge visible
you should now only have 4 layers : white background, template, large filled circle and the square layer
open up the tube and copy and paste as a new layer > image > mirror
add the same drop shadow as before
activate the layer with your filled image on the circle and selections > select all > selections > float > selections > defloat
duplicate twice to make 3 layers of iton the top layer go to adjust > add noise with these settings:uniform...monochrome~checked...noise~100%repeat for all 3 rain layers

on the top layer go to adjust > blur > motion blur with these settings:angle~330...strength~35
repeat this for the other 2 layers
selections > select noneopen up 'bow3' and paste as a new layer, place where u like and add a drop shadow
open up the word art  and paste as a new layer
add your watermark and the copyright and image > resize > 75% > all layers
add any text you wish to the tag
time to animate:rename the rain layers: rain1, rain2 and rain3
hide rain2 and rain3 and > copy merged and paste into animation shop
unhide rain2 and hide rain1 > copy merged and paste into animation shop after current frame
unhide rain3 and hide rain2 > copy merged and paste into animation shop after current frame
view animation and save

Thursday 16 August 2012

PUMPKIN


This tutorial was written by me on 31st October 2010 It assumes you have working knowledge of PSP and Animation Shop and it's tools, was written in Version 9, feel free to merge layers as when needed, unless otherwise stated
You will need:
Tube of choice, I am using the work of Elias Chatzoudis and u will need a licence to use his work
Scrap Kit 'Funky Halloween' which you can download from Kittz Kreationz
Eye Candy 5 - Impact - gradient glow

Open a new transparent image 600 x 250
select all > open FH_P3 and paste as a new layer > invert and hit delete > select none
fill the bottom layer black and on the paper layer change blend mode to luminance legacy and lower opacity to around 65
select your preset shape tool background to white and foreground null > size 4 and draw a rectangle within your image ( see mine ) > convert to raster
select your magic wand tool and click inside the white rectangle > modify > expand 1

open your tubes of choice and position inside the rectangle > when happy merge tubes together > selections > invert and hit delete> change blend mode to lumincance legacy
dulpicate the tube layer and using your free hand selection tool, draw around the pumpkin > selections > invert and hit delete > select none and change blend mode to normal
click on the white rectangle layer and add a small black gradient glow
add the copyrights and your mark add any textadd any elements from the scrap kit you like > merge visible and save as a .png
If you have any questions or comments regarding this tutorial  please leave me a comment below or write a message
in my Chat Box, alternatively you can email me at clare_33@live.co.uk

PRINCESS


This tutorial was written by me on 5th May 2010 It assumes you have working knowledge of PSP and Animation Shop and it's tools, was written in Version 9, feel free to merge layers as when needed, unless otherwise stated

You will Need:
Tube of choice, I am using the work of Keith Garvey, you will need a licence
My Supplies here
Template176 by Ali which you can download here NOT FOUND

Open the template and duplicate and close the original > delete the copyright layer> resize all layers 85% > image canvas size 600 x 600
flood fill the bottom layer white > click on raster2 > float > defloat > open pp1 and paste as a new layer > invert and delete > delete the original > rename pink
click on raster3 > float > defloat > open pp2 > paste as a new layer > invert and hit delete > delete the original layer > rename lt pink
click on raster4 > float > defloat > open pp3 and paste as a new layer > invert and hit delete > delete the original and rename dk pink
click on raster10 > drop shadow and repeat with raster8 and merge these 2 visible > rename hearts

click on the top heart > float > defloat > open pp4 and paste as a new layer and position a flower in the centre > invert and hit delete > delete the original layer and rename top heart
repeat with raster7 > rename bottom heart
click on the middle black heart > float > defloat > open pp5 and paste as a new layer > invert and delete > delete the original layer and rename midd heart
repeat with the larger black heart and rename right heart
merge down the hearts on the left > drop shadow
open the staple > resize 85% and paste as a new layer and position ( see mine ) duplicate and position above
click on light pink > float > defloat > open tube and paste as a new layer > invert and delete
merge down the hearts and the dark pink and move down to cover the corner of the light pink ( see mine ) > drop shadow
open up heart2 and paste as a new layer and position over the right heart
duplicate > resize 80% and position over the other black heart on the left
merge down the hearts
lower the opacity on the tube to around 55
open up glitter1 and paste as a new layer and drag to the bottom > duplicate and mirror
merge down
open the bow and resize 70% and paste as a new layer under the right heart > drop shadow
open up heart1 and paste as a new layer and drag to the bottom > click insode using your magic wand > expand 3 > open pp4 and paste as a new layer > invert and delete and drag below the frame > drop shadow frame
open your main tube > mirror and paste as a new layer and position > drop shadow
add any text you want > the copyrights and your mark
delete the background layer > merge visible and save as a .png
If you have any questions or comments regarding this tutorial  please leave me a comment below or write a message
in my Chat Box, alternatively you can email me at clare_33@live.co.uk
Related Posts Plugin for WordPress, Blogger...